
You know those nights when cooking feels like a mountain to climb, but takeout feels like giving up? That’s exactly where the Korean Ground Beef Bowl steps in like a weeknight hero. In less time than it takes to scroll through delivery options, you can have something hot, hearty, and deeply satisfying on the table. No fancy ingredients. No complicated techniques. Just pure flavor, fast.
At its core, this dish is a nod to the sweet-salty-savory magic that Korean cuisine is celebrated for. But what makes it special isn’t just the taste, it’s the rhythm it creates in your routine. One pan, one bowl, one happy family. Whether you’re a college student, a parent feeding picky eaters, or someone just craving bold flavor on a budget, this recipe adapts.
Here’s what you’ll find in this guide:
- A foolproof way to cook ground beef so it’s never dry or bland
- Optional add-ins to bulk it up or lean it down
- Tips for getting that addictive flavor balance (without extra work)
- Answers to the most common “Can I use…?” kitchen questions
It’s not just another beef-and-rice recipe. It’s comfort, convenience, and a little culinary confidence—all packed into one bowl.
Ingredients (With Substitution Tips)
Let’s break down what you’ll need to make this Korean Ground Beef Bowl shine and how to adapt it if you’re out of something or following a specific diet.
Core Ingredients You Can’t Skip
These are the flavor drivers. Without them, it’s just plain beef and rice.
- Ground beef (1 lb / 450 g) — 80/20 ground chuck gives the richest flavor, but leaner cuts work if you prefer.
- Soy sauce (2 tablespoons) — Brings that deep, umami backbone. For gluten-free, tamari is a perfect substitute.
- Sesame oil (1 tablespoon) — Adds a nutty, toasty aroma that’s essential to Korean-inspired dishes.
- Garlic (3 cloves, minced) — More than a seasoning, it’s an attitude. Fresh garlic really makes it pop.
- Ginger (1 teaspoon, minced or grated) — Lifts the savory depth with a hint of spice. Powdered ginger works in a pinch (just use half the amount).
- Green onions (2 stalks, chopped) — Stir some in, then save extra for garnish to brighten everything up.
- Cooked rice (2 cups) — Jasmine, basmati, or even brown rice all play well here. Want to low-carb it? Swap in cauliflower rice.
- Salt & black pepper — To taste, just enough to sharpen the edges of flavor.
Optional Add-Ins And Clever Substitutions
This bowl is as flexible as your fridge contents. Here’s how to riff on the recipe without ruining it:
- Add vegetables:
- Bell peppers, broccoli, shredded carrots, or spinach sautéed in the same pan
- Frozen stir-fry mix works when you’re short on prep time
- Boost protein or change it up:
- Swap beef with ground turkey, chicken, or even plant-based crumbles
- Add a fried egg on top (trust us, it’s transformative)
- Dial the spice:
- Stir in a teaspoon of gochujang (Korean chili paste) for heat and depth
- Or just drizzle sriracha if that’s what you’ve got
- Fresh toppings (optional but recommended):
- Kimchi, pickled radish, sliced cucumber, sesame seeds
- Adds crunch, tang, and visual flair
What if I don’t eat beef?
No problem, this bowl works beautifully with other proteins. Try:
- Ground chicken (light, less greasy)
- Ground turkey (milder flavor, leaner)
- Firm crumbled tofu or tempeh (great vegan options)
- Lentils or chickpeas (for a plant-powered protein punch)

Instructions (Step-by-Step Cooking Guide)
This Korean Ground Beef Bowl is all about smart sequencing: flavor first, then rice fluff, then bowl magic. Here’s how to make it work without stress.
Step 1: Brown the Beef
- In a large skillet over medium-high heat, toss in the ground beef.
- Break it up with a spatula or wooden spoon and let it sizzle undisturbed for a minute to get some browning.
- Stir occasionally and cook for about 5–7 minutes, until it’s fully browned and no pink remains.
- Optional: Drain excess fat for a lighter finish (especially if using 80/20 beef).
Flavor tip: Don’t crowd the pan. Give the beef space to sear, not steam.
Step 2: Add Aromatics
- Add the minced garlic and ginger directly into the skillet.
- Stir it all together and cook for 1–2 minutes. You’ll know it’s right when your kitchen smells amazing.
Shortcut note: If you’re using pre-minced garlic/ginger from a jar, reduce the amount slightly they’re more pungent.
Step 3: Season It Right
- Stir in the soy sauce, sesame oil, and chopped green onions.
- Add salt and pepper to taste.
- Let it all simmer gently for 2–3 minutes. This helps the flavors settle into the meat.
Too salty? Balance with a dash of honey or brown sugar.
Step 4: Make the Rice (Choose Your Method)
Stove Method:
- Rinse 1 cup of rice under cold water until the water runs clear.
- In a pot, add 2 cups of water and the rinsed rice.
- Bring to a boil, then reduce the heat to low, cover, and simmer for 15 minutes.
- Let it rest, covered, for 5 minutes, then fluff with a fork.
Rice Cooker:
- Combine rinsed rice and water (1:2 ratio), hit start, and walk away.
Instant Pot:
- Add 1 cup rinsed rice + 1 cup water.
- Seal, cook on high pressure for 3 minutes, then natural release for 10 minutes.
Rice Upgrade: Stir in a splash of rice vinegar and sesame oil post-cooking for a subtle zing.
Step 5: Assemble the Bowl
- Start with a generous scoop of warm rice at the bottom.
- Spoon the beef mixture over the rice.
- Top with steamed or sautéed veggies, if using.
- Finish with toppings like sesame seeds, extra green onions, kimchi, or a fried egg.
Presentation tip: Keep ingredients slightly separated in the bowl. It looks better and lets eaters mix to taste.
Can I make this ahead of time?
Absolutely. The beef mixture keeps beautifully in the fridge for up to 3 days. Store it separately from the rice to prevent sogginess. Reheat both before assembling.
Tips to Make It Even Better
This Korean Ground Beef Bowl is fast and flavorful by design—but these upgrades will push it into “repeat weekly” territory. Whether you’re chasing richer flavor, more texture, or next-level plating, here’s how to elevate your bowl.
Unlock More Flavor with Minimal Effort
- Double the aromatics: If you love garlic or ginger, don’t hold back. Doubling these gives the beef extra depth, especially if you let them brown slightly before adding the sauce.
- Splash of rice vinegar or lime juice: A dash of acidity balances the richness and wakes up the dish.
- Touch of sweetness: Add 1–2 teaspoons of brown sugar, maple syrup, or even mirin to the sauce for a sweet-savory balance reminiscent of bulgogi.
Flavor layering is your friend. Let the beef simmer in the sauce for a few extra minutes; it builds complexity.
Boost the Texture Game
- Crisp your beef: After the beef is cooked and seasoned, crank the heat for 30–60 seconds. Let parts of it crisp up without stirring.
- Add crunch: Sprinkle on toasted sesame seeds, crushed peanuts, or crispy shallots before serving.
Healthier (but still delicious) Tweaks
- Use lean meat: Ground turkey, chicken, or bison keeps it lean without sacrificing flavor, especially with a rich sauce.
- Go half-and-half: Mix beef with finely chopped mushrooms or lentils to lighten the load while adding umami and fiber.
- Swap the rice: Cauliflower rice or quinoa makes this low-carb and nutrient-dense.
Pro tip: A mix of half jasmine rice, half riced cauliflower offers the best of both worlds—comfort and lightness.
Serve Like a Pro
- Color contrast counts: Add something green (scallions, cucumbers), something red (kimchi, radish), and something golden (fried egg) to make your bowl pop.
- Use a wide, shallow bowl: It cools more evenly and lets you arrange ingredients for maximum visual impact.
Can I freeze the leftovers?
You bet. Just skip adding fresh veggies or egg before freezing. Store the beef mixture and rice in separate freezer-safe containers. Defrost overnight in the fridge, then reheat and assemble fresh.
Variations & Substitutions
One of the best things about the Korean Ground Beef Bowl is how easily it adapts to whatever’s in your fridge or whoever’s coming to dinner. Vegan cousin? Picky kid? Spicy-food fanatic? This bowl can handle it all.
Protein Swaps That Work
Don’t eat beef? No problem. These all work beautifully:
- Ground turkey or chicken – Lighter flavor, leaner cut, same savory base.
- Tofu – Crumble firm tofu and pan-fry until golden before adding sauce.
- Tempeh or lentils – Earthier, more textured vegan option.
Pro tip: Add a splash of soy sauce and sesame oil to vegan proteins early in cooking to build a deeper base flavor.
Vegetable Flexibility
These bowls are built for veggie dumping. Try:
- Quick sautéed add-ins: bell peppers, zucchini, spinach, mushrooms
- Roasted extras: sweet potatoes, cauliflower, Brussels sprouts
- Pickled toppings: carrots, daikon, cucumbers (add brightness and balance)
Color = craveability. Aim for at least 3 colors in your bowl for flavor and visual appeal.
Flavor Curve Adjustments
You can shape the taste to suit any palate:
- Sweeter: Add a touch of honey, maple syrup, or brown sugar
- Spicier: Gochujang, sriracha, chili crisp, or crushed red pepper
- Tangier: Splash of lime juice or rice vinegar
Don’t be afraid to layer—sweet + spicy + salty is the Korean flavor trifecta.
Bowl Base Alternatives
Rice is the classic, but here are some off-road options:
- Cauliflower rice – For a lighter, low-carb version
- Quinoa – Nutty, protein-rich, and fluffier than rice
- Noodles – Try soba, udon, or even ramen for a new texture
- Salad greens – A warm topping over crisp lettuce makes a killer grain-free bowl
What if I want to make it kid-friendly?
Tone down the spice, leave toppings on the side, and let kids “build their own bowl.” It turns dinner into a mini DIY moment, and picky eaters are more likely to try something they helped assemble.
FAQs
Can I use ground turkey or chicken instead of beef?
Yes! Both turkey and chicken are leaner options that still soak up the bold flavors of garlic, soy sauce, and sesame oil. Just be mindful: leaner meats can dry out faster, so don’t overcook them. A splash of broth or extra sesame oil can help keep things juicy.
What should I serve with the Korean Ground Beef Bowl?
This bowl is pretty complete on its own, but it pairs beautifully with:
- Pickled veggies (like radish, carrots, or kimchi)
- Cucumber salad with a tangy vinaigrette
- Miso soup or a light broth on the side
- Steamed edamame for extra protein and crunch
Try pairing it with iced green tea or a crisp Asian lager to round out the meal.
How can I store leftovers?
Simple. Store the beef and rice separately in airtight containers in the fridge:
- Keeps fresh for up to 3 days
- Reheat beef in a skillet or microwave (add a splash of water if it seems dry)
- Reheat rice gently with a damp paper towel over it to restore fluff
Can I make this ahead for meal prep?
Absolutely. This dish is a meal-prepper’s dream:
- Make a large batch of beef
- Portion into containers with rice and veggies
- Add toppings fresh (like green onion or sesame seeds) right before eating
It’s freezer-friendly too; freeze the beef mixture and rice separately, then thaw and reheat as needed.
Is this recipe gluten-free?
It can be! Just swap soy sauce with tamari or coconut aminos. Always double-check your condiments if you’re cooking for someone with Celiac or a serious sensitivity.
Nutrition Information
This dish might taste indulgent, but it’s surprisingly balanced, especially if you tweak it to suit your goals. Here’s an estimated nutritional breakdown per serving (based on 4 servings using 80/20 ground beef and white rice):
- Calories: ~430 kcal
- Protein: 22–25 g
- Fat: 20–22 g
- Carbohydrates: 35–40 g
- Sugar: ~2 g (mainly from optional add-ins like gochujang or sweet sauces)
- Sodium: ~600–800 mg (varies based on soy sauce brand and added salt)
Want to lighten it up?
- Use leaner meat (like 93% ground turkey or chicken) to cut ~5–8g of fat
- Swap rice for cauliflower rice to drop carbs by ~30g
- Add more veggies to increase fiber and volume without adding many calories
- Cut back on soy sauce or use a low-sodium version to reduce sodium content
Is this dish good for meal prep or fitness goals?
Yes! The high protein content makes it great for strength-building or macro-focused meal plans. Be mindful of sodium if you’re watching your blood pressure or preparing in bulk.
For high-protein goals: add a fried egg or extra lean meat on top. For lower-carb: skip the rice and serve it over sautéed greens.
CONCLUSION:
Let’s be real, life doesn’t pause, so we can cook gourmet meals every night. But that doesn’t mean we have to settle for bland. The Korean Ground Beef Bowl proves that with just a few pantry staples, a hot skillet, and 25 minutes, you can plate something that feels intentional, comforting, and just a little bit exciting.
Whether you’re feeding toddlers, roommates, or just yourself after a long day, this dish meets you where you are and leaves you with one less thing to worry about. And the best part? It’s endlessly adaptable. Spicy or mild, meaty or vegan, rice or greens… this bowl is yours to shape.
So next time you’re staring into your fridge wondering, “What can I throw together that’s actually good?” remember this one.
Try it. Make it yours. And hey, if you find your perfect combo? Come back and share it.
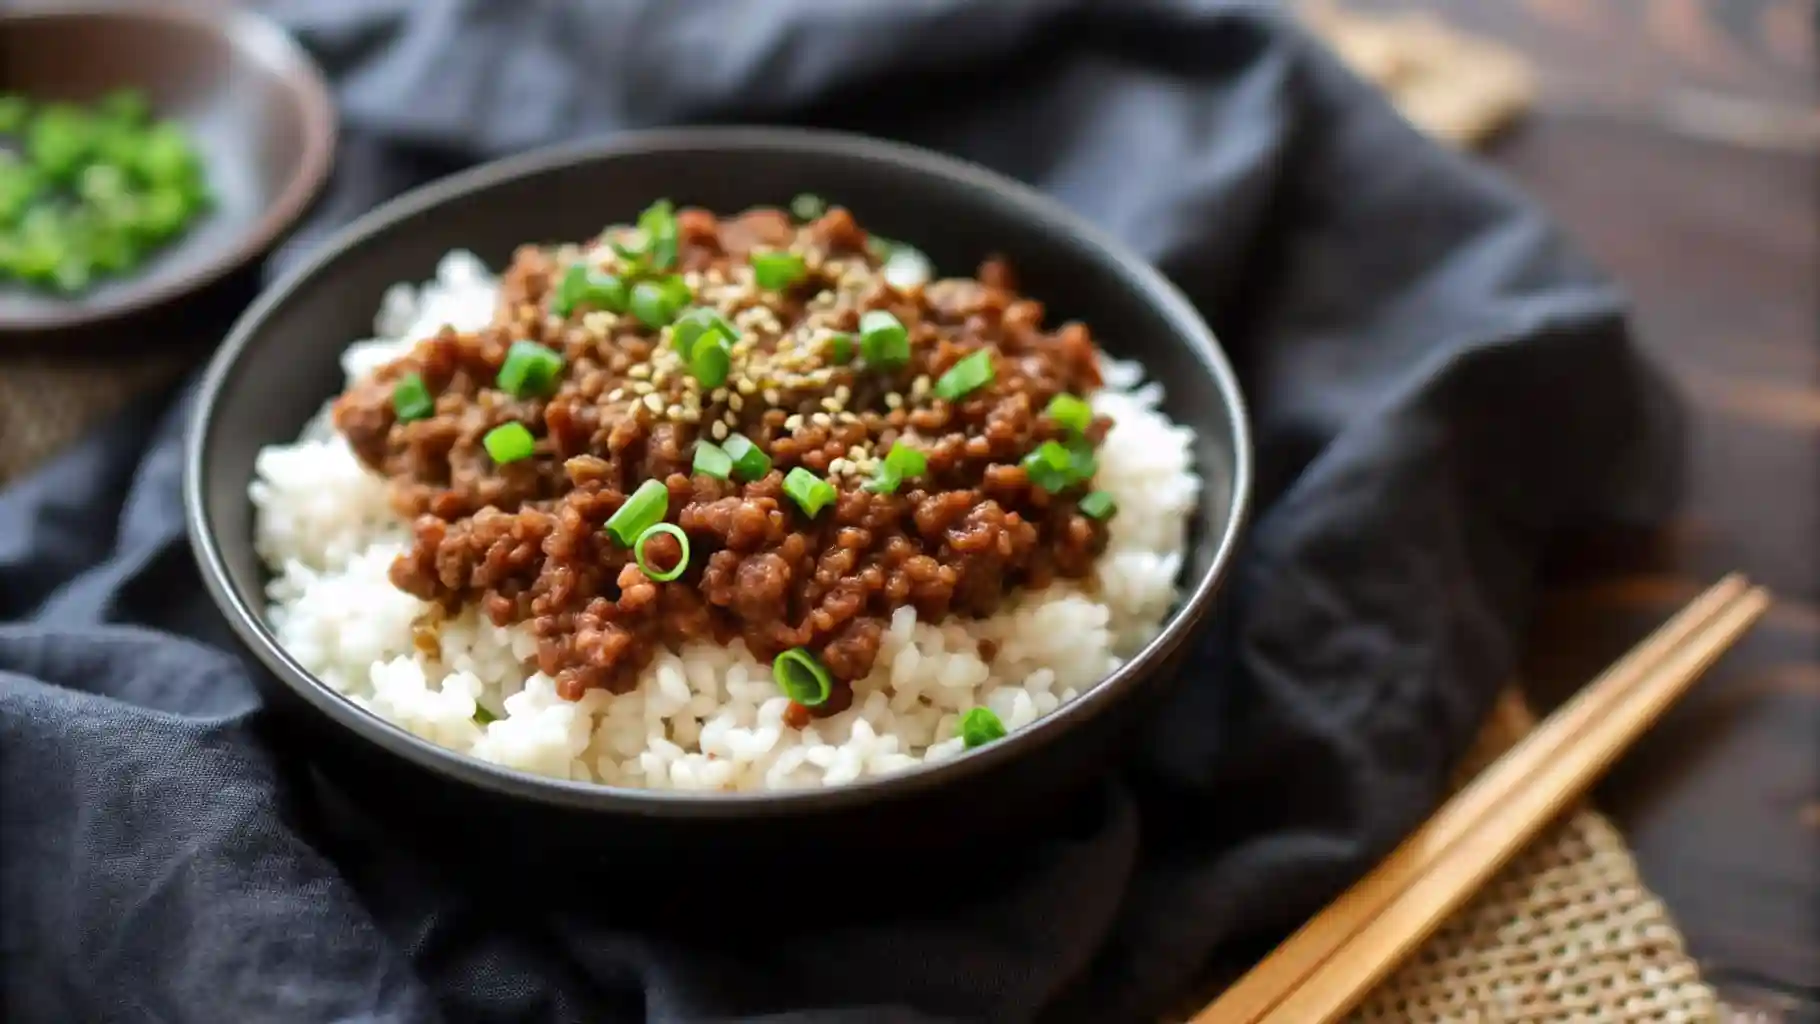
Korean Ground Beef Bowl
Ingredients
Equipment
Method
- In a large skillet over medium-high heat, cook ground beef, breaking it apart with a spoon, until browned and no longer pink (about 5–7 minutes). Drain excess fat if needed.
- Add minced garlic and ginger to the skillet. Cook for 1–2 minutes until fragrant.
- Stir in soy sauce, sesame oil, and chopped green onions. Season with salt and pepper. Let it simmer for 2–3 minutes to blend the flavors.
- Meanwhile, cook rice using your preferred method: stovetop, rice cooker, or Instant Pot. Fluff when done.
- Assemble bowls by placing a layer of rice in each, followed by the beef mixture. Add vegetables and toppings of choice (like a fried egg or kimchi).