

There’s something almost rebellious about biting into a pizza crust that crackles beneath your teeth, only to give way to a chewy, airy center with big blistered bubbles you didn’t think were possible outside a wood-fired oven. And yet, here you are at home, maybe in slippers, about to unlock that exact experience.
This artisan pizza dough recipe isn’t just a “homemade version,” it’s the real deal, scaled for the oven you’ve got. Whether you’re aiming for a pizza night that rivals your favorite spot downtown or just obsessed with getting that perfect char on the edge, this recipe is for you.
Here’s why it works: a high hydration ratio (yep, that sticky dough is a feature, not a bug), a slow fermentation that builds deep flavor, and the use of intense surface heat to get that dreamy crisp-bottomed, chewy-topped result. No gimmicks. No fancy mixer. Just you, flour, water, salt, yeast, and the kind of dough that makes your oven feel like Naples.
Stick with this guide and you’ll soon be shaping billowy dough balls that puff up like little clouds in the heat. Let’s get into the what, how, and why, and make some unforgettable pizza.
Why This Dough Works: The Science of Crispy-Chewy Pizza
Have you ever bitten into a slice and paused like, How did they get that crackly edge and soft interior at the same time? The answer isn’t in some secret flour or expensive oven. It’s in three precise choices: hydration, fermentation, and heat. Let’s break them down.
1. High Hydration = Big Bubbles + Chew
This dough clocks in at around 75% hydration. That means for every gram of flour, there’s 0.75g of water, a ratio that makes bakers nervous but crust lovers drool.
Why it matters:
- More water = more steam = larger air pockets during baking.
- Moist dough bakes into a crust that’s crispy on the outside, stretchy and tender inside.
- It caramelizes beautifully at high heat, giving you that bronze blistered finish.
But here’s the deal: it’s gonna be sticky. Don’t fight it, work with it. Wet your hands, keep flour nearby, and remember: wet dough = great crust.
2. Long Fermentation = Complex Flavor
Instead of rushing the rise with a ton of yeast, this dough uses just ¼ tsp of yeast and relies on time to do the heavy lifting. You’ve got two options:
- Room temp (5–6 hrs): For a same-day artisan miracle.
- Cold ferment (up to 48 hrs): Slows things down, builds flavor depth, and improves dough strength.
During this time, enzymes break down starches into sugars and proteins into flavor compounds. TL;DR It’s where bland dough becomes beautiful.
3. Blazing Heat = Blistered Bottoms
A pizza stone or steel acts like a heat trap, soaking up your oven’s fire and slamming it into the dough the second it lands.
You’ll want to:
- Preheat for at least 45 minutes at 500°F (or higher if your oven allows).
- Bake directly on the hot surface (no parchment).
- Use broil for those final few minutes to char the top like a legit pizzeria.
Can’t get your oven that hot? Cast iron works too; it mimics the intense heat and gives you a lovely browned base.

Ingredients for Artisan Pizza Dough
Let’s keep it simple: just four ingredients: flour, water, salt, and yeast. But it’s the ratios and quality that make the difference.
| Ingredient | Metric (g/ml) | Volume / US Standard |
|---|---|---|
| All-purpose flour | 500g | 3 ¾ cups + 2 tbsp |
| Warm water (divided) | 375g (ml) | 1 ½ cups + 2 tbsp |
| Fine salt | 10g | 1 ½ tsp |
| Active dry yeast | 1g | ¼ tsp |
Ingredient Notes
- Flour: All-purpose works beautifully here. If you’ve got 00 flour, that’s a bonus, more delicate chew and flavor. But technique > flour type.
- Water: Use lukewarm (not hot) water around 100°F / 38°C is ideal for dissolving yeast without killing it.
- Salt: Go for fine sea salt or kosher salt; avoid iodized table salt.
- Yeast: Active dry yeast is standard, but instant yeast can be swapped 1:1.
Optional Add-ins (if you like to riff)
- A splash of olive oil (5–10g) for slightly softer edges.
- 1 tsp sugar or honey to help with browning (especially in colder ovens).
- Dried herbs or garlic powder, if you’re feeling bold.
How to Make Artisan Pizza Dough
Dough Preparation (Total hands-on time: ~20 mins)
- Mix flour and water.
In a large bowl, combine 500g flour with all but 1 tbsp of the warm water (reserve the rest). Stir just until no dry flour remains. Cover and let rest 20 minutes (autolyse stage improves dough structure). - Activate yeast.
Sprinkle ¼ tsp yeast into the reserved warm water. Stir and let sit until dissolved (about 5 mins). - Add salt and yeast mix.
Sprinkle 1½ tsp salt across the dough’s surface. Pour in the yeast mixture. - Incorporate everything.
Wet your hand, then fold and pinch the dough like this:- Stretch a section over the top.
- Pinch off chunks across the bowl.
- Repeat until fully combined into a shaggy, sticky mass.
- Rest for 1 hour.
Cover and let sit at room temp.
Gluten Development
- Fold once.
Wet your hand. Reach under the dough, stretch a section up, and fold it over the center. Rotate and repeat 4–5 more times to form a tight, smooth top. - Bulk ferment.
Flip the dough (seam side down) into a lightly oiled container. Cover. Let rise at room temperature for 5–6 hours, or refrigerate up to 48 hours for a deeper flavor.
Shaping Dough Balls
- Divide and pre-shape.
Lightly flour a surface. Turn out the dough and cut into 2 equal pieces. For each:- Stretch one edge out and fold over the center.
- Repeat with the remaining edges.
- Flip over, seam side down.
- Tension drag: Use cupped hands to gently pull dough towards you on an unfloured spot, rotating as needed until it tightens into a ball.
- Rest.
Place each ball on a lightly oiled plate. Oil the tops, cover with plastic wrap, and let sit at room temp 1 hour (or refrigerate up to 2 days).
Baking Instructions
- Preheat oven.
Place a baking steel/stone/inverted sheet or cast iron in the middle of the oven. Preheat to 500°F (260°C+) for 45 minutes minimum. - Shape the crust.
On a floured surface, flatten the dough center into a disc, leaving a 1″ rim. Pick up the dough, rotate by the rim, and let gravity stretch it into a 12″ circle. - Transfer and top.
Place dough on a floured peel (or prepared cast iron). Add sauce and toppings, keeping edges bare. - Bake.
- Slide onto steel/stone and bake 5 minutes.
- Broil 2–4 minutes until crust blisters and cheese browns.
- If using cast iron, bake 15–20 mins and broil last 2 minutes.
How to Store, Refrigerate, or Freeze Artisan Pizza Dough
This dough isn’t just a one-night wonder. With proper storage, you can prep ahead for a party, keep backup balls in the freezer, or enjoy a more flavorful crust with slow cold fermentation.
Refrigerating the Dough (Best Flavor Development)
When to refrigerate: After shaping into balls (Step 9)
Steps:
- Lightly oil dough balls and place on a greased plate or tray.
- Cover tightly with plastic wrap to prevent drying.
- Refrigerate for up to 2 days.
To use:
No need to bring to room temperature. Just shape straight from the fridge; the chilled dough is actually easier to handle.
Freezing the Dough (Long-Term Option)
Best time to freeze: Right after shaping into balls
Steps:
- Place dough balls on a greased parchment-lined tray, cover loosely.
- Freeze overnight.
- Wrap each frozen dough ball in plastic wrap, then place it in a sealed freezer bag.
- Store in freezer for up to 3 months.
To thaw:
- Preferred: Transfer to fridge overnight, then use as usual.
- Faster (riskier): Leave at room temp for a few hours, then refrigerate again until baking time. Watch for over-proofing.
Pro Tips
- Always oil your dough balls and containers to prevent sticking and skin formation.
- Mark your containers with the date and batch size if you’re freezing multiples.
- Frozen dough may brown slightly less than fresh; broil a bit longer if needed.
Scaling Artisan Pizza Dough for a Crowd
This dough plays nicely with math. Whether you’re feeding two or twenty, scaling up is easy, just keep the ratios tight and the container large enough.
Base Formula (per dough ball)
Each full batch makes:
- 2 × 12″ pizzas
- Feeds 2 very hungry adults, or 3–4 light eaters if served with salad or sides
So if you’re cooking for 8:
- Make 4× the recipe
- That’s 8 dough balls/pizzas
- Use a large tub (10–12 quarts), or divide into multiple bowls
Scaling Tips
- Use a digital scale. Flour packs inconsistently, so scaling by volume becomes unreliable fast.
- Maintain hydration and yeast ratio. Don’t increase yeast disproportionately; keep it low and let time do the work.
- Allow more room to rise. The dough mass increases significantly during fermentation make sure your container has space.
- Chill extra balls. Not using all of them tonight? Refrigerate or freeze per the storage instructions.
Batch Example: Triple the Recipe
| Ingredient | Amount |
|---|---|
| All-purpose flour | 1500g (≈ 11¼ cups) |
| Warm water | 1125g (≈ 4½ cups + 2 tbsp) |
| Fine salt | 30g (4½ tsp) |
| Active dry yeast | 3g (¾ tsp) |
Makes: 6 dough balls = 6 pizzas
Essential Tools & Smart Substitutes
You don’t need a wood-fired oven or fancy gear to pull off this pizza — but a few strategic tools will absolutely level up your results. Here’s what matters, and what you can use if you’re working with a basic setup.
Must-Have Tools
- Digital Scale
Volume is guesswork; weight is precision. Especially crucial with hydration ratios. - 6-Quart Dough Container
Gives room for dough expansion during bulk rise. A large bowl with plastic wrap works in a pinch. - Pizza Peel
Lets you transfer raw pizza safely onto a hot surface. Use the back of a floured baking sheet if needed. - Baking Steel or Stone
Absorbs high heat and delivers that crisp, blistered base. Thin inverted sheet pans are a weaker but usable substitute.
Substitutes That Work
| Tool | Ideal Version | Budget-Friendly Backup |
|---|---|---|
| Baking Steel | Modernist Steel Plate | Thick pizza stone / heavy cast iron |
| Pizza Peel | Aluminum 16″ peel | Inverted floured baking sheet |
| Dough Tub | Cambro 6 qt. container | Any large bowl + plastic wrap |
| Digital Scale | 0.1g-sensitive scale | Cup measurements (less accurate) |
Bonus Tip: Infrared Thermometer
Not essential, but it helps you confirm when your stone/steel is truly hot enough (~500–550°F) before launching the pizza. Saves a lot of guesswork.
Troubleshooting Sticky or Slack Dough
High hydration dough is supposed to feel unfamiliar, sticky, stretchy, and a little unruly. But there’s a difference between “wet-but-workable” and “I think I just made soup.” Here’s how to spot (and fix) the top pitfalls.
Problem #1: Dough Feels Too Wet to Shape
What’s happening:
- You may have slightly over-measured water or under-measured flour.
- Ambient temperature or high humidity could be softening the dough further.
Fixes:
- Don’t add more flour to the dough mass. Instead, dust your surface generously and wet your hands when working with it.
- Cold dough is easier to handle. Refrigerate for 30 mins to firm it up before shaping.
Problem #2: Dough Spreads Too Much or Rips
What’s happening:
- The gluten structure isn’t developed enough.
- You might’ve over-proofed it or didn’t fold tightly during shaping.
Fixes:
- During shaping, make sure to create surface tension by dragging and rotating the dough ball across the counter.
- If the dough resists holding its shape, let it rest for 10–15 minutes, then try again. Gluten needs time to relax and recover.
Problem #3: Dough Has Over-Proofed (Looks Puffy, Collapses Easily)
What’s happening:
- Fermentation often went too far due to warm temperatures or leaving it out too long.
Fixes:
- Gently deflate and reshape into a tight ball. Let it rest again, but use it within 30–45 minutes.
- Next time: Reduce the yeast slightly or ferment in a cooler environment.
Nutrition Information (Per Serving)
Each 12-inch pizza serves 2 people comfortably. Nutrition is calculated per ¼ of a pizza roughly one generous slice.
| Nutrient | Amount per ¼ pizza |
|---|---|
| Calories | 228 kcal |
| Carbohydrates | 48g |
| Protein | 6.5g |
| Fat | 0.6g |
| – Saturated | 0.1g |
| – Unsaturated | 0.4g |
| Fiber | 1.7g |
| Sugar | 0.2g |
| Sodium | 488mg |
| Cholesterol | 0mg |
| Trans Fat | 0g |
Note: These values reflect just the dough, not including sauce, cheese, or toppings.
FAQs
Can I use sourdough starter instead of commercial yeast?
Yes, but it changes the game. Replace the 1g of yeast with about 100g of active starter. Then reduce the flour by 50g and the water by 50g. Fermentation times may increase. Flavor? Incredible.
What if my oven only goes up to 450°F?
No worries. Extend the baking time by a couple of minutes and use a broiler finish to blister the crust. A cast-iron pan also helps retain high heat longer.
Why did my dough tear while shaping?
Tearing usually means underdeveloped gluten or over-proofed dough. Let it rest 15 minutes and reshape gently. Make sure you’re not using too much flour on top it can dry the surface.
CONCLUSION
Let’s be honest, most pizza dough recipes are fine. They’ll get the job done. But this one? This is the dough you’ll remember.
It’s not just about feeding yourself or others. It’s about chasing that moment: when the crust blisters perfectly, the center stays airy, and you realize you made this from scratch. With four ingredients, your own two hands, and a little time, you pulled off something that tastes like a wood-fired fantasy.
If you’ve never worked with wet dough before, don’t worry. The first time might feel weird. The second time feels easier. By the third, you’re tweaking hydration like a pro and dragging dough balls like a pizzaiolo.
When you make it, come back. Leave a comment, share your tweaks, your topping experiments, your oven hacks. Dough like this isn’t just about replication, it’s about obsession. And trust me, there’s a whole world of pizza nerds here for it.
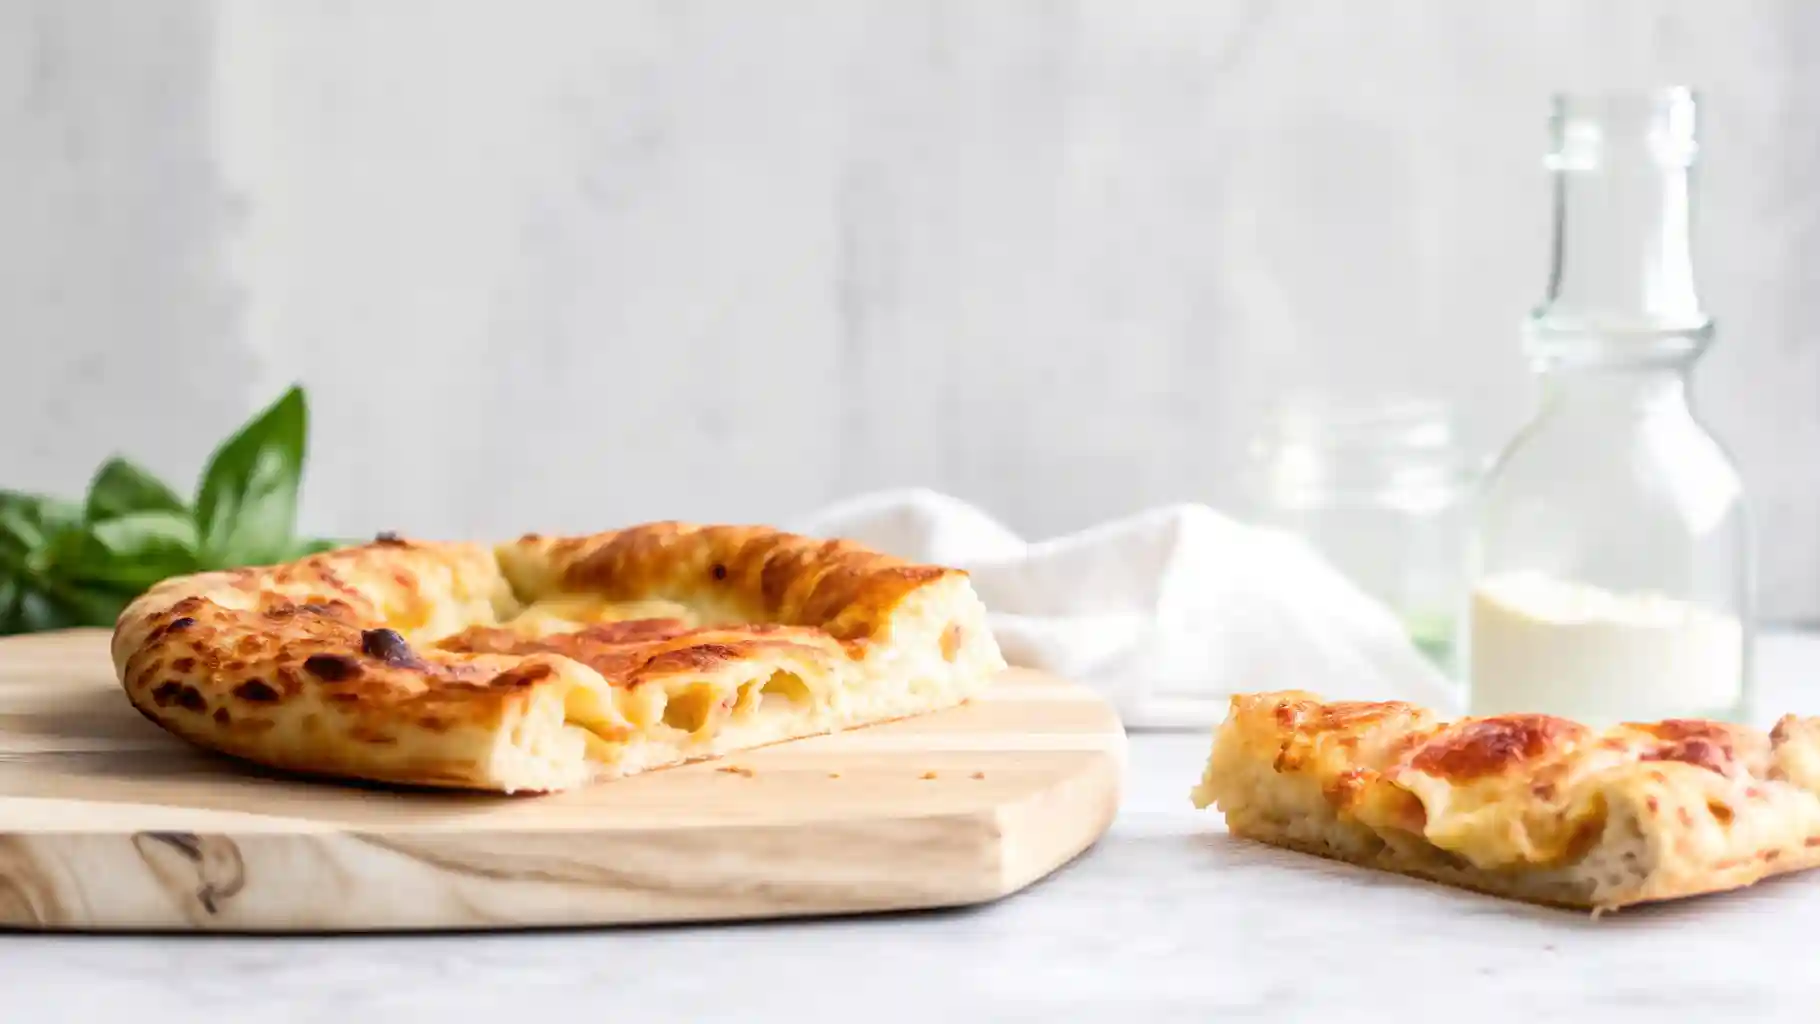
Artisan Pizza Dough – Crispy, Chewy, Bubbly Crust
Ingredients
Equipment
Method
- Mix flour with all but 1 tbsp of water. Cover and rest for 20 minutes.
- Dissolve yeast in reserved water. Add salt to dough. Pour in yeast mixture.
- Pinch and fold dough until well incorporated. Rest for 1 hour.
- Fold dough to build strength. Place seam-side down in greased container and bulk ferment for 5–6 hours.
- Divide dough into 2 balls. Shape by folding and tightening on counter. Rest 1 hour or refrigerate up to 2 days.
- Preheat oven with steel/stone to 500°F for 45 minutes.
- Shape dough into 12-inch round. Top as desired.
- Bake for 5 minutes, then broil 2–4 minutes until golden and blistered.