

Some desserts are technically impressive. This one is just reliably good. The Dirt Cake Recipe is a no-bake dessert built from crushed Oreos, a cream cheese and pudding filling, and whipped topping layered together until it looks exactly like a pot of soil, gummy worms and all. It takes about 20 minutes to assemble, requires zero oven time, and disappears fast no matter where it shows up.
The best oreo dirt cake version works because the filling strikes the right balance between rich and light. Cream cheese adds tang and structure. Chocolate pudding provides the deep cocoa flavor. Whipped topping keeps the whole thing from feeling too heavy. The chocolate oreo dirt cake combination has been a staple at potlucks and casual gatherings for decades, and the reason is simple: it’s genuinely delicious and requires no baking skill whatsoever.
Dirt Cake Recipe Ingredients
- 1 package (14.3 oz) regular Oreo cookies
- 8 oz cream cheese, fully softened
- 1/4 cup unsalted butter, softened
- 1 cup powdered sugar
- 2 packages (3.4 oz each) instant chocolate pudding mix
- 3 cups whole milk
- 12 oz whipped topping, thawed (Cool Whip or similar)
- Gummy worms for topping, optional but classic
Instant pudding mix is what makes this dirt cake recipe easy chocolate pudding style. No cooking, no tempering, just whisk with cold milk and let it set. Whole milk gives a thicker, creamier pudding than low-fat alternatives, which tend to stay looser and can make the layers slide. Fully softened cream cheese is critical here. Cold blocks of cream cheese will leave lumps in the filling no matter how long you beat it.
The Oreos get processed into fine crumbs for the bottom and top layers. You can use a food processor or seal them in a zip-lock bag and crush with a rolling pin. Both methods work. Leaving some slightly larger pieces in the crumbs gives the topping a more natural soil-like texture, which is part of the visual appeal of the chocolate dirt dessert presentation.
How to Make This Dirt Cake Recipe Step by Step
- Crush all Oreo cookies into fine crumbs using a food processor or sealed bag. Set aside.
- Whisk instant chocolate pudding mix with cold whole milk in a large bowl for 2 minutes. Let sit 5 minutes until thickened.
- In a separate bowl, beat softened cream cheese and softened butter together on medium speed until completely smooth, about 2 minutes.
- Add powdered sugar to the cream cheese mixture and beat until fluffy and fully combined.
- Fold the thickened chocolate pudding into the cream cheese mixture gently with a rubber spatula until evenly combined.
- Fold in the whipped topping in two additions, keeping the mixture light and airy rather than deflating it by stirring aggressively.
- In a 9×13 inch dish, trifle bowl, or large flower pot, spread half the Oreo crumbs as the base layer.
- Spread the full cream cheese pudding filling evenly over the crumbs.
- Top with the remaining Oreo crumbs to cover the filling completely.
- Refrigerate at least 2 hours before serving. Overnight is better.
- Press gummy worms into the top just before serving.
Folding rather than stirring the whipped topping in is the difference between a fluffy, mousse-like filling and a dense, flat one. Use a spatula in slow circular motions from the bottom of the bowl upward. It only takes about 8 to 10 folds to fully incorporate it without losing the airy texture that makes the easy oreo dirt cake filling so satisfying to eat.
Swaps and Ingredient Substitutions
For an oreo dirt cake recipe easy dairy-free version, use vegan cream cheese, plant-based butter, dairy-free whipped topping, and prepare the pudding with oat milk or almond milk. Note that plant-based milks make slightly thinner pudding, so refrigerating the assembled dessert overnight helps firm it up properly before serving.
Swap the chocolate pudding for vanilla if you prefer a lighter flavor, or use cookies and cream pudding mix for more Oreo intensity throughout. For oreo dirt cake with chocolate pudding fans who want extra depth, add two tablespoons of unsweetened cocoa powder to the cream cheese mixture before folding in the pudding. It boosts the chocolate flavor without changing the texture.
Presentation Variations
The dirt cake casserole format in a 9×13 dish is the most practical for feeding a crowd since it slices cleanly after chilling. A clear trifle bowl shows off the layers and requires no slicing. Individual clear plastic cups are ideal for serving at gatherings since each person gets their own portion with visible layers. Flower pots scrubbed clean are the most visually striking serving vessel, especially with gummy worms sticking out of the top.
The dirt recipe oreo base can also be made in a 9-inch pie dish for a sliceable version. Press the crumbs up the sides slightly to form a loose crust, fill with the pudding mixture, and top with remaining crumbs. It won’t hold as a traditional pie slice, but served with a spoon it’s just as satisfying. Refrigerate longer, at least 3 to 4 hours, for the pie dish version to set properly.
Storage
Cover tightly and refrigerate for up to 5 days. The Oreo crumbs on top soften slightly over time as they absorb moisture from the filling below, which some people actually prefer since the softer crumb integrates more into the top layer. If you want crunchier topping on leftovers, add a fresh layer of crushed Oreos before serving rather than storing with the full crumb layer already applied.
This dessert does not freeze well. The whipped topping and cream cheese filling separate when frozen and thawed, turning grainy and watery. Make it fresh and keep it refrigerated. It’s easy enough to assemble a day ahead, which is actually better since the flavors meld and the layers set more firmly overnight.
FAQ
Can I use homemade whipped cream instead of Cool Whip?
Yes, but stabilized whipped cream holds up better over multiple days. Whip 1 and 1/2 cups of heavy cream with 2 tablespoons powdered sugar and 1/4 teaspoon cream of tartar until stiff peaks form. It works well but deflates faster than commercial whipped topping. Serve within 2 days for best results if using homemade whipped cream.
Does it need to be refrigerated overnight?
Two hours is the minimum, but overnight is strongly preferred. The layers need time to set and firm up, and the flavors develop more fully with a longer chill. A dirt cake pulled from the fridge after two hours will be softer and harder to serve cleanly. Eight hours or more gives you the best texture and cleanest layers.
Can I make individual portions in cups?
Absolutely. Layer crumbs, filling, and more crumbs in individual clear cups or small mason jars. This format is especially useful for make-ahead serving since each portion is already ready to grab from the fridge. Gummy worms pressed into the top of each cup before serving complete the look. No scooping or slicing required.
Can I use reduced-fat cream cheese?
Yes, it works fine. The filling will be slightly less rich and a little softer in texture, but it still tastes good and holds its shape after chilling. Avoid fat-free cream cheese since it has a noticeably different flavor and doesn’t whip as smoothly with butter, which affects the final texture of the filling.
What size dish works best?
A 9×13 inch baking dish feeds 12 to 15 people comfortably. For smaller servings, an 8×8 dish works with the full recipe for thicker, deeper layers. A trifle bowl or clear serving bowl is great for visual impact but doesn’t slice as cleanly. Use whatever container fits the setting.
What if my filling is too runny?
The pudding likely wasn’t thick enough before being folded in. Let the pudding sit an additional 5 to 10 minutes before combining it with the cream cheese mixture. If the assembled dessert seems loose, refrigerate it for the full overnight period rather than just a couple of hours. It will firm up significantly as everything sets in the cold.
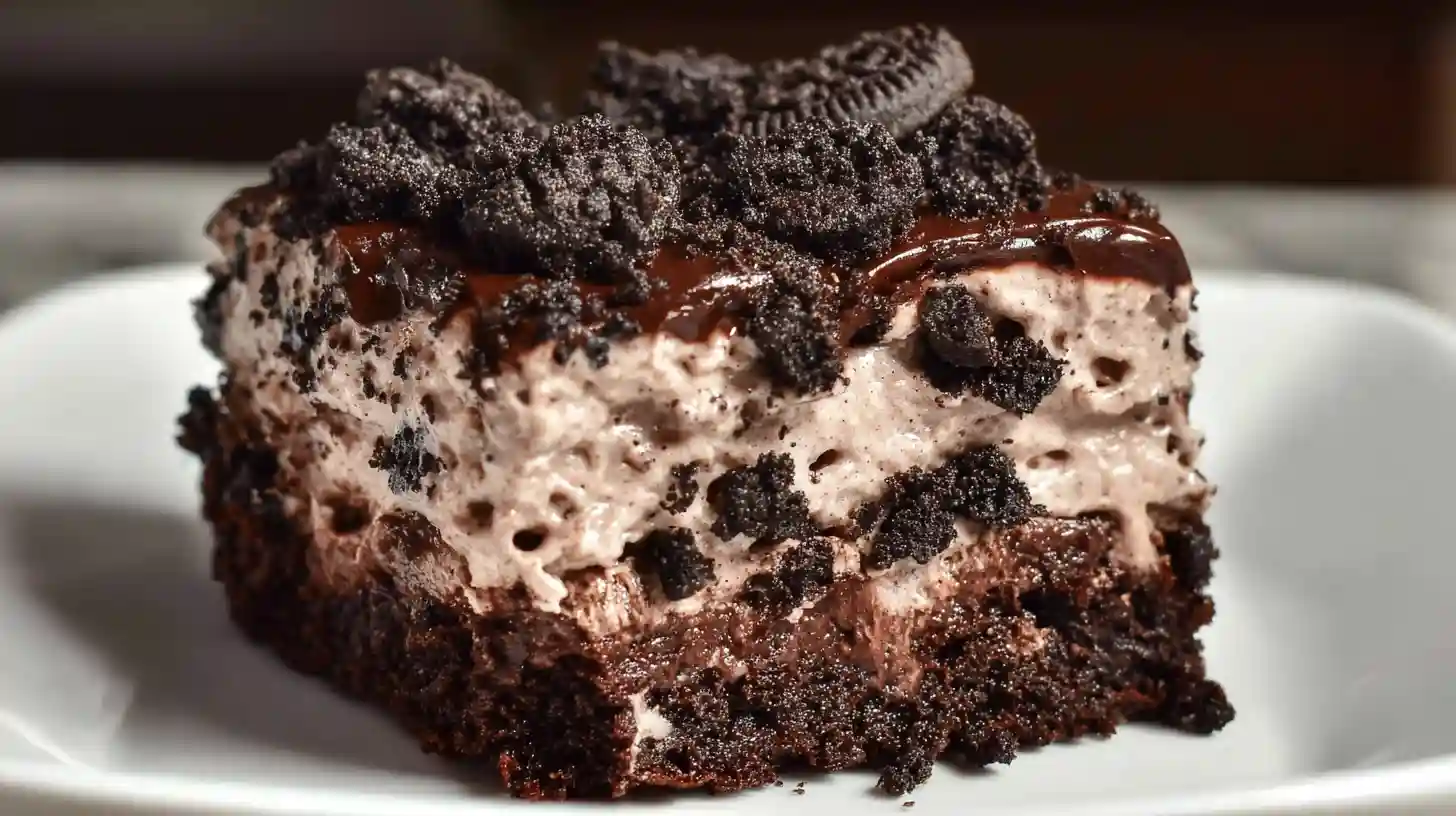
Dirt Cake Recipe – A Delicious Dessert
Ingredients
Equipment
Method
- Crush Oreos into fine crumbs and set aside.
- Whisk pudding mix with cold milk 2 minutes. Let sit 5 minutes to thicken.
- Beat softened cream cheese and butter until smooth, then add powdered sugar and beat until fluffy.
- Fold thickened pudding into cream cheese mixture until combined.
- Fold in whipped topping gently in two additions to keep it light.
- Layer half the Oreo crumbs in dish, spread filling over top, then cover with remaining crumbs.
- Refrigerate at least 2 hours, preferably overnight. Add gummy worms before serving.
Notes
- Cream cheese must be fully softened to avoid lumps in the filling.
- Fold, do not stir, the whipped topping to keep the filling light.
- Overnight refrigeration gives the best texture and set layers.
- Add gummy worms just before serving, not before chilling.